How to create variable product in Woocommerce

How to create variable product in Woocommerce

What is Variable Product?

When your product has multiple options and prices respectively.  That moment the variable product idea comes up. Generally, we use a simple or external product in Woocommerce.  Suppose, when your T-shirt has different colors and sizes.   Also, when it costs different prices. That’s why Woocommece plugin has a variable product idea. Using this option, you can easily create variable product in woocommerce.

Let’s see how to do it easily.

How to create variable product in Woocommerce

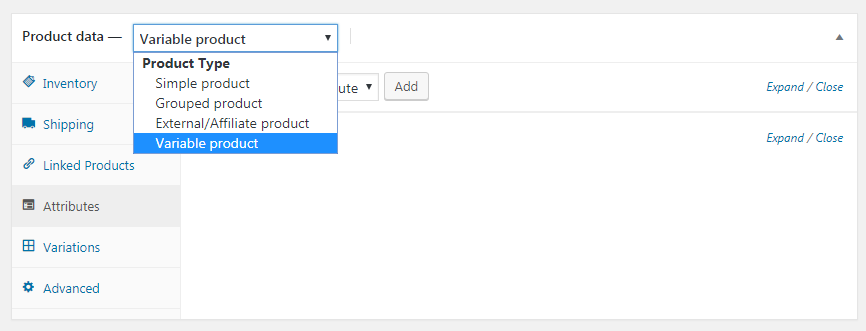
First, as usual, go to “Add product” from your WordPress Admin Dashboard.

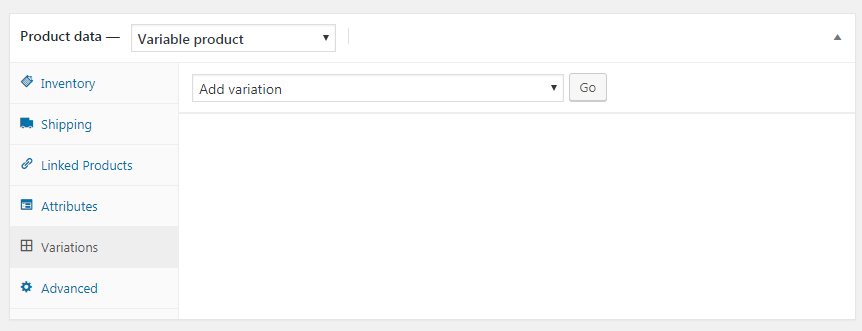
Select “Variable Product” from the top drop-down.

Woocommerce variable products


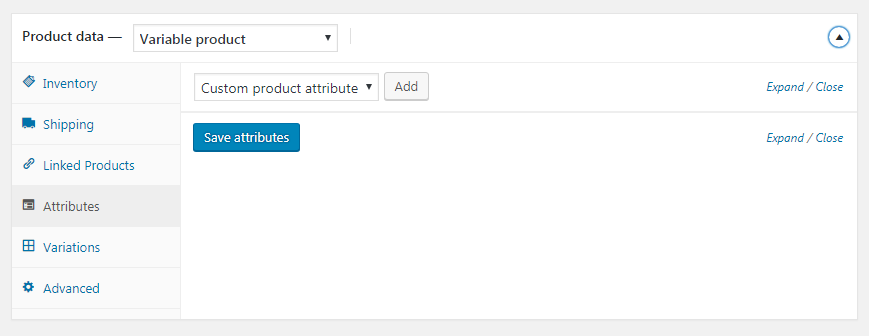
Go to “Attributes” section and click “Add” button to add attributes for the product.

Product Attributes


Now, add attribute values like the following screenshot.

adding woo attributes


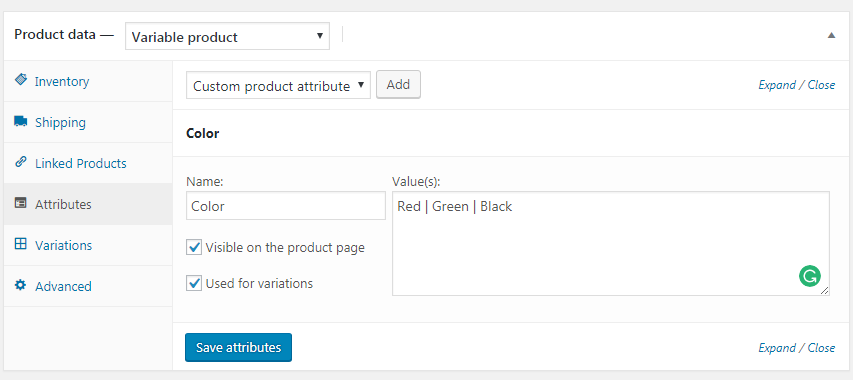
You can add other attributes like Size, clothes type etc in the same way.


Now it’s time to add variations in the product.

Go to Variations section and click the “Go” button to add variation in Woocommerce.

woocommerce variation


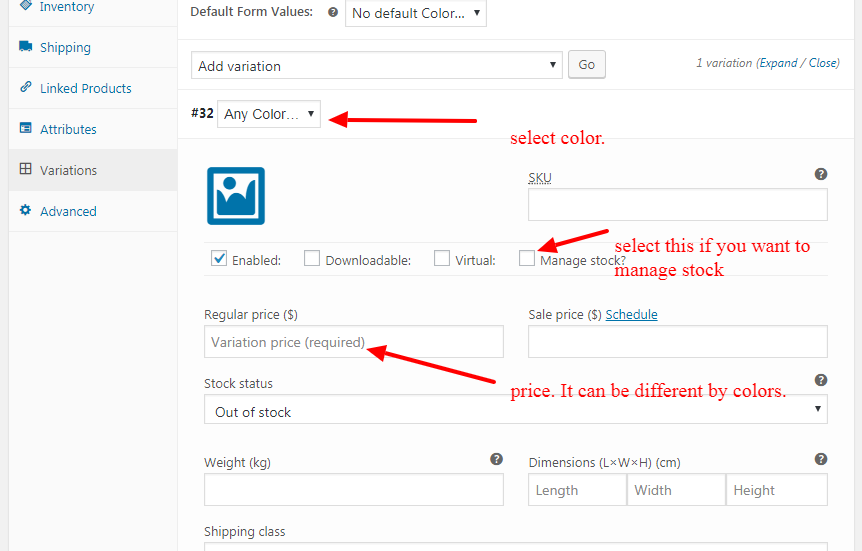
Now, add variation values like price, stock, weight shipping info etc.

Just in case you need to add some extra stock options in WooCommerce. You can learn here about this. 

For an example, a T-shirt has 3 different colors. Red, Green, and Black. Suppose, Red costs 19, Green is 20 and Black for 17.

Select color from the variation dropdown. Then place price. Do the same for the others too.

You are done.

Woocommerce Variation


See the Product live. You will see a price range. Once you select a color, you will see a different price set.

This is the Woocommerce variable product concept.

how to set up woocommerce store

Learn how to set up Woocommerce Store in less than 10 Minutes

how to set up woocommerce store

Image: Woocommerce


WooCommerce is a big thing not in WordPress, but in the online world. You can make a store with ease. Let’s say an online store within 30 minutes.

The things you need [must-need]

  1. Woocommerce compatible themes
  2. Install WooCommerce plugins
  3. Your products
  4. Payment gateway

Most important thing is Woocommerce compatible themes. In case, your theme is not supporting woocommerce. Then the site looks will be very awkward.  Read here to learn how to make a theme that supports woocommerce.

Here are few steps to make your first awesome online store that sells flawlessly.

Install WooCommerce Plugin:

The first task is to install the WooCommerce plugin. Install it directly from WordPress Plugins repo or from your computer.

Now, activate it.

Configure WooCommerce Store:

Right after the activation, you will be automatically redirected to a setup page.  It’s called Woocommerce setup wizard.

WooCommerce Setup Wizard


Set it up giving all the information it wants. You will need to put the info about shop location, where to ship, payment gateway etc.  They are pretty easy to set it up. Make sure you are providing right information otherwise your sale can not be processed perfectly.

Create your first woocommerce product:

To add your first product, go to Dashboard > Products > Add products

Then follow the screenshot for the better concept.


how to add product in woocommerce

In price box, you can set up SALE price for a product.

You can control the inventory in inventory tabs.

Also, you can add products size, shipping class or methods in shipping tabs.

If the product is a virtual product like freelancing or a downloadable product like software, you can select those select box above.

In product data dropdown option, you can select other product types. Variable product for various product option, color, size etc., external products for affiliate links. Also, you can add grouped product.

Well, after giving all the info, now publish your first product.

Conclusion:

Now it’s time to test the product. See how it works.

Go to the product link, click on the “add to cart” button for the shopping.

Now go to the checkout page to buy.

These procedures are for the test. Just to make sure the store is working or not.

Caution: if you set up Paypal for the payment gateway, make sure you are using in Sandbox mode while testing. 

how to make multilingual site

How to make multilingual site easily?


You can make a multilingual website in WordPress using plugins in few steps. There are many plugins out there. Some are free and very notable like qTranslate.

  1. qTranslate X
  2. Polylang
  3. WPML [not free and the best one so far]
  4. xili-language

You can find them on WordPress Repo.

I am going to show you how to make multilingual site using qTranslate X plugins.

Step 1: Install qTranslate X plugins and activate it. 

Step 2: Go to plugin settings. You will see this in “General” tabs 


qtranslatex multilingual plugins


You can choose language here. To add a new language, follow the next step.

Step 3: Click on the “Language” tabs. You will see language list. 

Your language is not in the list? 

No problem. You can add new language on qTranslate X plugin.

Suppose, you are trying to add the Hindi language.

Click here to download the hindi .mo and .po file.

Download/Export all of them.


download .mo file


Download both .po and .mo and rename it in_IN.po and in_IN.mo, just an example. Have a look at the default German(DE) language example to get it clearly.

Now go to wp-content folder. You will see a folder called languages. Copy the all downloaded .mo file and paste there.

To get a clear concept of adding a new language. Just edit a language from the language tabs.


add a new language in wordpress


So the Hindi language setting will be


add new language in qtranslate x


And you are done.

Step 4:

Now go for creating a post or page. You will see language tabs up on the editor. Click on English language tabs and add English content. and do so for Hindi and other languages.

Conclusion:

You got the method. Now try on some test project on localhost.

How to Install WordPress Plugins Automatically and Manually

What is WordPress Plugins?

WordPress plugins are some piece of codes that give your site extra functionality. Generally, any custom functionality codes should be added to functions.php. But it won’t give you some on/off control over that functions. That’s why the plugins idea came up. So you need to create a plugins file and upload it. You can then activate it or deactivate it when you don’t need them.

Why do we need to add plugins?

As I said above paragraph that to gain control over the function concepts gear up the plugins idea. Suppose, you need to add a custom form for contact. You can simply add some meta box codes in functions.php. It could let down sites with some extra weights. Most importantly, you can’t get off/on control. That’s why you need to open a text editor, add some plugins header, then your codes for the custom form. Where you can add some backend control form that can be manageable from WordPress dashboard. So let’s see how to install plugins.

How to install WordPress Plugins?

Installing plugin is super easy. just go to WordPress Plugins Repository. Select a plugin and download. Now, go to your WordPress site Dashboard > Plugins > Add New > Upload plugins. Select the downloaded plugins from your computer. You can install plugins by searching as well. This is called “Add plugins Automatically”.

WordPress Plugins

Now, you can also install plugins through FTP or Cpanel. Using FTP client like Filezilla is also too easy. Just you need to locate the plugins folder file from the site directory. Then just drag and drop to the plugins folder. The directory hot link be like “your-site/wp-content/Plugins. This is called add plugins manually.

You can install plugin easily on your Localhost. If you are using WAMP or XAMP or MAMP in your computer, then just copy the unzipped plugins file to the wp-content/Plugins folder.

At the last, just activate the plugins. Done!

How to create plugins?

You may be wondering how to make a plugin. It is really advanced topics. But I can give you some basic concept.

Open a text editor. I like Notepad++ editor. Anyway, add some text with php tag.

<?php 

/*
Plugin Name: plugin-name
Plugin URI: http://yourpluginsite.com
Description: plugin description
Author: Name
Version: 1.0
Author URI: http://yoursite.com
*/

Save it and copy this PHP file to wp-content/plugins. Then go to Dashboard > Plugins, now you will see your plugins. Activate it. You are done. It is a just very first concept. You can read Plugins development here.

Conclusion:

Now you learn how to install plugins extensively and how to make plugins just in concept. You can also check how to install themes here.

How to install WordPress Themes?

How to install wordpress themes Automatically

It’s easy. First, go to WordPress themes directory

WordPress Themes directory

Then, click any of them. After that, download themes.

wordpress themes download

Now, install the themes. Go to your WordPress Dashboard > Appearance > Themes > Click on “Add new Theme” > Click “upload themes” , Then activate it. You are done!

upload themes

How to install wordpress themes Manually

It’s easy but a little bit different. You need FTP login or Cpanel login.

First, you need to unzip your downloaded zipped themes file. Now, log in to your FTP clients, let’s say Filezilla. Now go to the site folders themes directory, Site contents generally on the “public_html” folders if you are BlueHost, HostGator, Dreamhost user. Well, now drag the themes folder to the themes folder in FTP client. Done. I recommend this method if the themes file is very big that can exceed uploading limits.

You can do this almost same method through Cpanel and file manager.

If you want to install themes on Localhost if you are using WAMP or XAMP. Just, go to your themes file, copy it. Then paste it in localhost’s where your website’s themes folder located.

Now you learn how to install themes automatically, manually and locally. That’s all!